If you enjoy desserts that are light, moist and very subtle in sweetness, this amazing sponge cake recipe is for you. It’s great on its own and also yummy when paired with freshly whipped cream and fruit. Honestly, the only bad thing I have to say is that this cake is so light, it feels like you’ve eaten nothing at all; and because it is so delicious, you’ll feel the desire to eat the entire thing in one sitting. 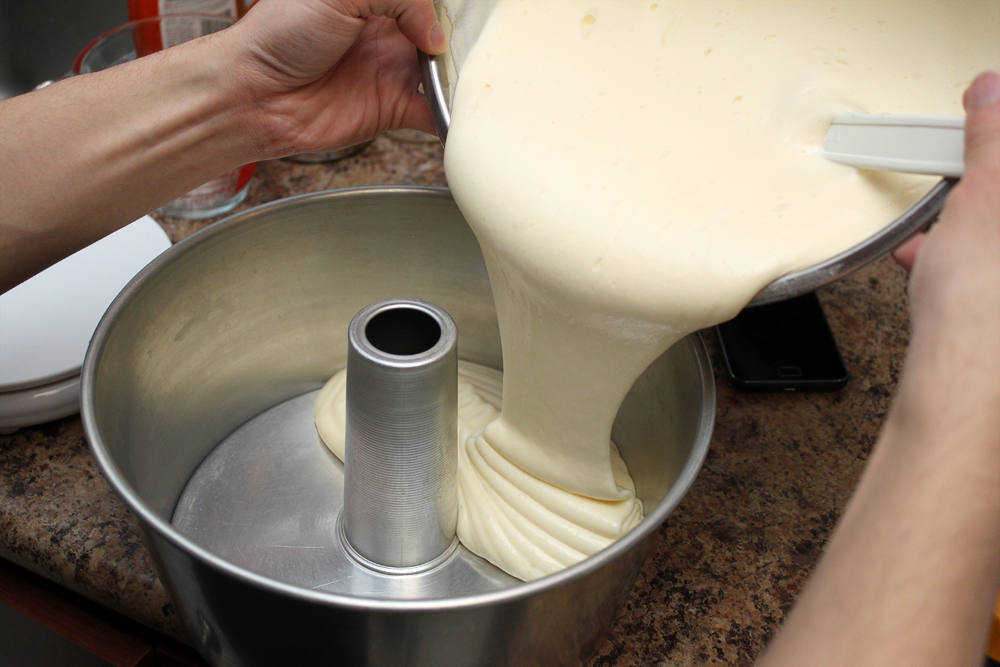
I have to credit the knowledge of this recipe to my mother who learned it from a friend, who learned it from another friend, who learned it from another friend and so on. For the longest time we were calling it ‘angel cake’, but recently I learned that angel food cakes don’t contain egg yolk (which this recipe calls for) and that this was more of a sponge cake recipe. Sometimes, I use the recipe to make large cupcakes with different fillings, but I will share that adapatation for another time. I have yet to try making this cake using a spring form cake pan, but if anyone does, I’d love to know your results! Happy baking!
SUPER SPONGE CAKE
YEILD: 1 cake
TIME: 1 hour (15 minutes active time)
INGREDIENTS
Wet
8 large egg yolks (at room temperature)
3/4 cup sugar
1/2 cup oil
1/2 cup milk
1 tsp vanilla extract
1 cup (130g) flour
1/4 tsp salt
1 tsp baking powder
Egg white foam
1/2 tsp cream of tarter
8 large egg whites (at room temperature)
Special Culinary Tools
Angel-Cake Pan [10-inch]
INSTRUCTIONS
1. Position oven rack at middle level and preheat to 350 F/175 C.
2. Sift the flour, salt and baking powder together and set aside.
3. In a large mixing bowl, add egg yolks, sugar, oil, milk, and vanilla extract and beat together on medium speed until pale yellow in color and smooth throughout.
4. Then, add the flour mixture into the egg yolk mixture and beat on low speed until smooth without lumps. Set aside.
5. In another large mixing bowl, whisk together cream of tartar and egg white on high speed until it transforms into a foam like consistency and stiff peaks begin to form, about 4 – 6 minutes. At this point you can turn the bowl upside down without any of the foam falling out. If you are using a whisk by hand, this might take some time and arm power to gain the same result.
6. Using a rubber spatula, carefully fold egg whites into yolk concoction in three batches one direction until smooth so that the whites don’t lose their volume, do not over mix. The mixture will be slightly viscous but still fluid enough to pour.
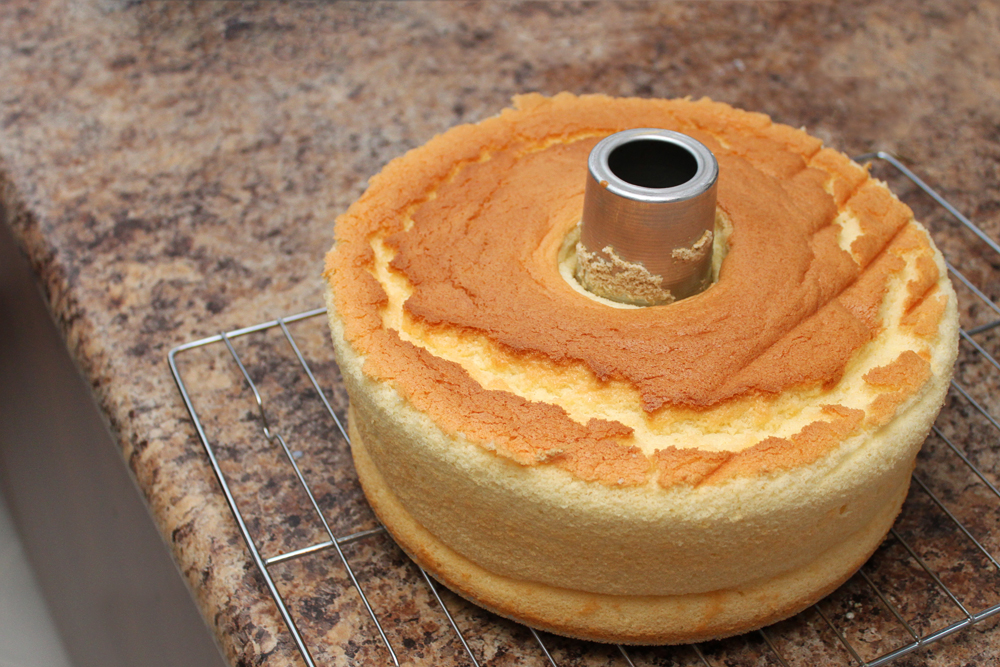
7. Now, spoon or pour the mixture into an un-greased angel-cake pan and slide onto the middle rack, baking for 45 mins. It’s important to use an un-greased pan because this allows the cake to cling onto the sides and rise beautifully. The cake is done baking when the top becomes a caramel brown color and a toothpick comes out clean when inserted into the middle.
8. Flip the pan upside down (so the cake does not sink) and cool for 15 mins before serving. If the cake proves difficult to remove from the pan, carefully run a knife inside the outer rim to loosen the cake before allowing gravity to help slide it out. Cool completely before storing and it will be good for 2 – 4 days afterwards in an airtight container (although it rarely even lasts an hour at our household).
NOTES
- If you are finding that the cake is tasting ‘eggy’ (this recipe should only produce a faint eggy trace), leave it for several hours to allow this taste to dissipate. Another possible reason could be that the fluffed egg whites are not mixed evenly throughout the batter. Adding a dash more of vanilla extract will help mask this taste.
- When whipping your egg whites, make sure you whip just until stiff peaks form and no further. Overmixing will either deflate the whites, or make it extremely hard to mix into the batter. To test for stiffness, dip your whisk into the egg whites, pull it up and turn it upside-down so the egg whites are facing up. The whites should form a point and bend only very slightly at the very tip. Here is a visual guide from theKitchn.