

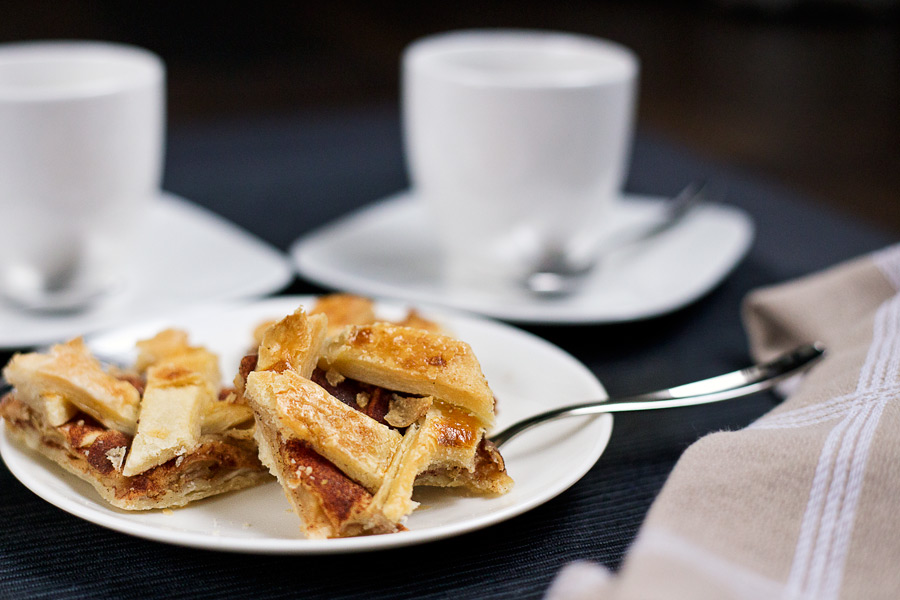
I had this apple pie squares idea stuck in my head for over a month now. I would write down the recipe, go about my day and fall asleep, only to dream of apple pie squares dancing around me. Then, I would wake up and fervently correct the recipe based on my dreams. It was with excitement and relief when I finally had the time and energy to try out the recipe I imagined.
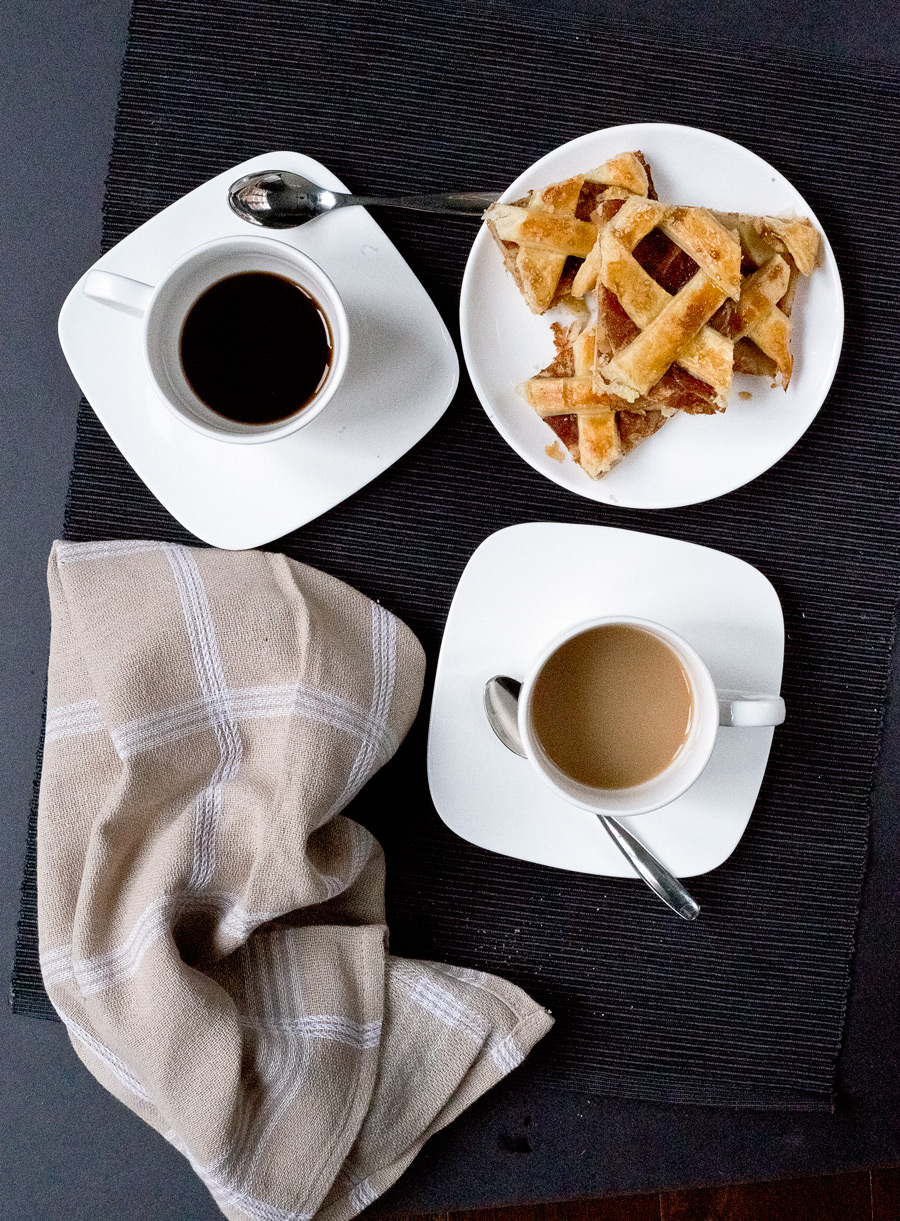
I wanted to make a light, square bar version of an apple pie that you can easily pack to work or school as a snack. Make no mistake—slices of thick, hot apple pie dolloped with ice-cream are delicious in their own way. But sometimes I just want a small nibble to compliment my milk or tea.
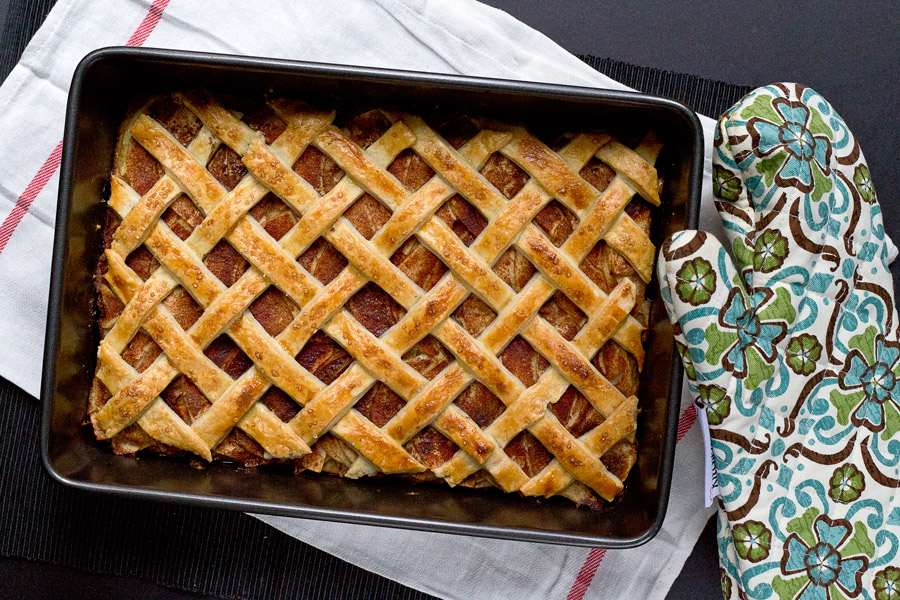
There was much trial and error during the testing of this recipe. During one attempt, I realized it took around 35-40 minutes of baking time to develop a golden crust, but this dried out the filling due to the gaping holes in the lattice crust. To remedy this, the lattice needed to be woven tighter to protect the filling from the heat. To further ensure the filling would retain flavour and moisture, I decided to seal in the apples with a layer of clarified butter brushed on top.
Please take a look at the notes section to learn more about the explanation behind the ingredients choice and instructions. Without further ado, enjoy!
Frances’ Apple Pie Squares with Flaky Butter Crust
YIELD: 18 squares
ACTIVE TIME: 35 min
TOTAL TIME (active + inactive time): 1 hr 40 min
CREDITS: Frances Lam
INGREDIENTS
Crust
- 325 g (2 1/2 cups) All Purpose Flour
- 1 cup Butter (cold)
- 1 tsp salt
- 2 tsp sugar
- 1/2 cup ice water (the edges of the water should be forming a thin layer of ice)
Apple Filling
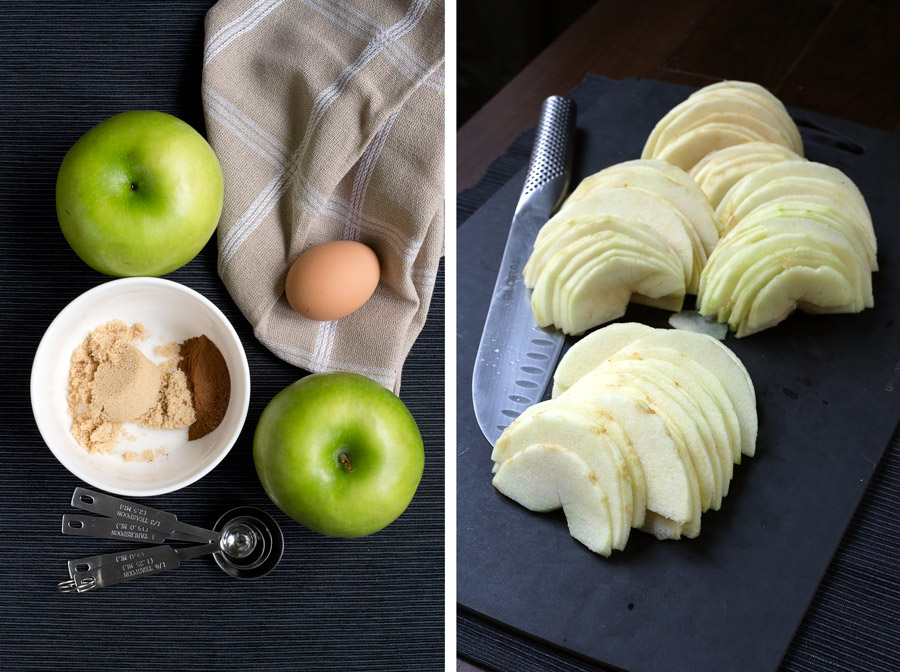
- 3 or 4 Large Granny Smith Apples (More if you like more apple filling)
- 1/4 cup Clarified Butter/Ghee (or unsalted butter)
- 1/8 cup + 1 tbsp White Sugar
- 1/8 cup + 1 tbsp Brown Sugar
- 2 tsp Ground Cinnamon
- 1/4 tsp Ground Nutmeg
Topping
- 1 egg (beaten)
- 2 tbsp brown sugar
- 1/4 tsp Coarse Salt
Other Tools
- A 13” x 9″ baking pan (or 15″ x 10″) (greased)
INSTRUCTIONS
Crust
- In a large bowl, whisk together the sugar, salt and flour. Cube the butter into roughly 1cm cubes and mix into the flour using a pastry blender or a food processor (I use a pastry blender). Continue mixing until you achieve a coarse texture and the butter pieces are about half the size of a pea. It doesn’t have to be perfect. Add a quarter of the ice water and mix together with a spatula, repeat until you’ve finished adding all the water. At this point, it should look like the dough is barely going to hold together but don’t worry—it will. Use your hands and gather all the bits into a ball and divide in two. Flatten into large rectangular disks. Wrap with plastic wrap and refrigerate for at least 30 minutes.
- Roll out half of the chilled pie dough into a sheet of about 1/8″ thickness. Placing the dough on a cutting board, use the baking pan as a guide and trace a rectangular shape with a knife, until you have a piece that fits perfectly in the bottom of the pan. Place this piece inside the pan and pop into the fridge. It is important to do this because warm dough is difficult to manipulate and will lose it’s shape.
Making Clarified Butter (If you have clarified butter/ghee, skip this step).
- Heat the unsalted butter in the microwave on high for 1.5 – 2.5 minutes or until you form a layer of white on top of the melted butter. Spoon out all of this white as best as you can. What’s leftover is clarified butter which can be used for sautéing at high temperatures without burning, unlike butter.
Filling
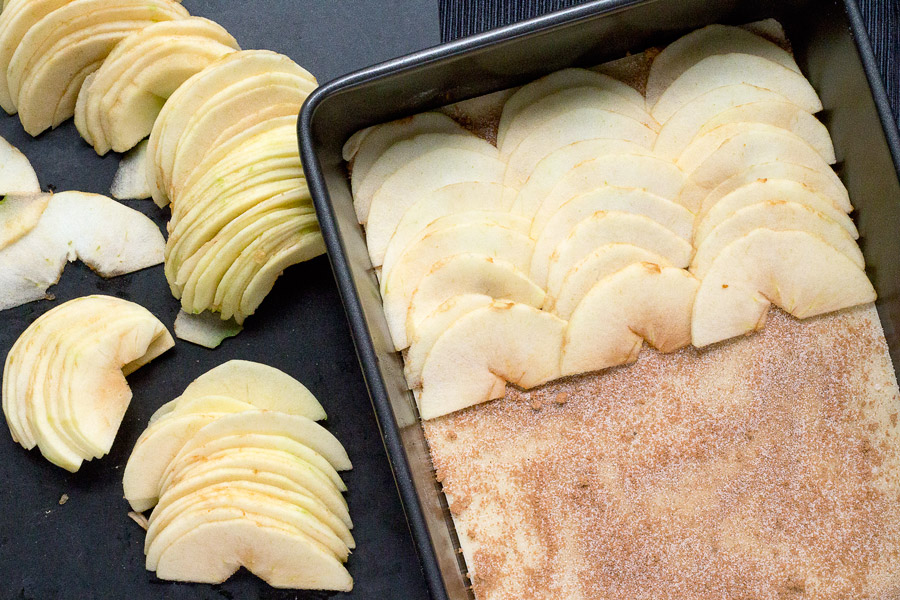
- Combine the white and brown sugar, ground cinnamon and ground nutmeg from the ‘Apple Filling’ list in a small bowl. Peel, halve, and core the apples. Slice into thin half moon shapes approximately 3 mm thickness. Sprinkle half of the sugar mixture onto the base crust in the pan. Arrange apple slices on top using an overlapping pattern. Repeat for another 2-3 layers. Brush ghee or clarified butter on top of the apple slices and sprinkle the rest of the sugar mixture on top.
- Roll out the second half of the dough, approximately 1/8 in thickness or thinner. Slice into even strips and arrange into a lattice pattern on top of the apple and sugar layer. Adjust so that each hole in the lattice is no bigger than 0.5 cm. If the holes are too big, the apples will dry out. At this point, you can either proceed to baking, or wrap the entire pie and place in the freezer to bake at another date.
Baking
- Preheat the oven to 350° C. Brush the beaten egg onto the lattice crust, followed by sprinkling with brown sugar and coarse salt. Bake for 30-35 minutes, until the tops are golden and remove from oven. Let it cool for 10 minutes and remove it from the pan. My method is to shimmy a butter knife around the edges of the crust, place a cutting board on top of the pan and flip it over together so that the apple pie is now upside down. Remove the pan, sandwich the pie between another cutting board and flip it back over right side up. Proceed to cut into squares and enjoy! Refrigerate the leftovers and reheat in a microwave/toaster oven before serving.
NOTES
- Measure the flour by weight rather than using cups which is more accurate. The reason is because flour can be densely or loosely packed depending on how the flour was scooped and this can make a HUGE difference.
- Let the dough rest for a minimum of 30 minutes after putting it together. Gluten bonds are formed when water reacts with flour, which is what allows everything to stick together in one mass. The more the dough is worked, the more gluten bonds form, which results in a tougher/chewier pastry. For pie crust, we want it to be more tender and crumbly. Resting the dough gives time for the gluten bonds to breakdown, which makes it stretchier to work with and gives a more tender/crumbly texture post-baking. For this reason, I recommend making the dough ahead of time such as the night before.
- When rolling out the crust, make sure to work quickly and with chilled dough. When dough is warmed, it shrinks and loses shape. If you find this happening, pop it into the fridge/freezer until chilled and try again.
- Have you ever sautéed something with butter and realized that it burns really easily? This is because the smoke point of butter is at 350° C, due to the milk solids. Clarified butter (ghee), which is butter with the milk solids removed, has a smoke point of 450° C and can withstand the heat of the baking process, which is why I used it. To learn more about cooking fats and their smoke points, read this Serious Eats article.


![@Frances.menu This 3-in-1 Thai🇹🇭 experience brings together @piinong_thai (named one of Toronto Life’s Best New Restaurants of 2025), @lamaimassage.toronto upstairs, and a Thai marketplace, all in one spot ✨
The Thai massage seriously loosened up my joints, I felt more mobile and flexible afterwards! You can choose between a tabletop massage or the traditional Thai mat, which we went with for a more authentic experience.
Package options:
👥Couple's Retreat $299 (we did this one)- 60 min Thai massage + 3 course meal for 2
👤Solo Serenity $149 - 60 min Thai massage + 3 course meal for 1
👤Royal Thai Indulgence $225 - 120 min Thai massage + 3 course meal for 1
👤Midday Recharge $49 - 30 min Thai massage + 3 course lunch for 1
Thank you for having us @piinong_thai and @lamaimassage.toronto! (sponsored)
[#torontoeats #torontofoodie #datenightyyz toronto thai food, authentic thai massage, thai massage and meal, soft shell crab curry, buo loy, award winning restaurant]](https://frances.menu/wp-content/plugins/instagram-feed/img/placeholder.png)
This is so good i ended up baking 10-15 min longer because the top won’t brown and just white sugar but everything turned out great loved the crust!!
So glad you liked it! Would love to see photos if you’ve uploaded to instagram!