

Bunny Butter Cookie
Click to Skip to the Bunny Butter Cookie Recipe Baking a little slice of calm in a very chaotic world—and that’s exactly what inspired today’s recipe: Bunny Butter Cookies.
Continue Reading Click to Skip to the Bunny Butter Cookie Recipe Baking a little slice of calm in a very chaotic world—and that’s exactly what inspired today’s recipe: Bunny Butter Cookies.
Continue Reading
This Peach Almond Dacquoise Cake makes the perfect gluten free afternoon tea dessert!
Continue Reading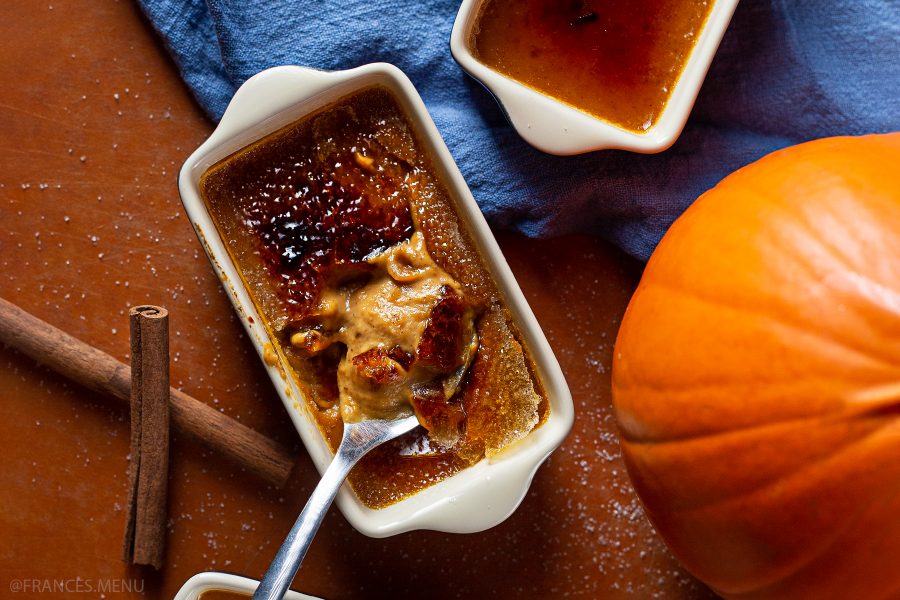
Looking for that perfect 🦃Thanksgiving party dessert that is both impressive and easy to make? This pumpkin creme brulee recipe will transform your Fall parties forever!
Continue Reading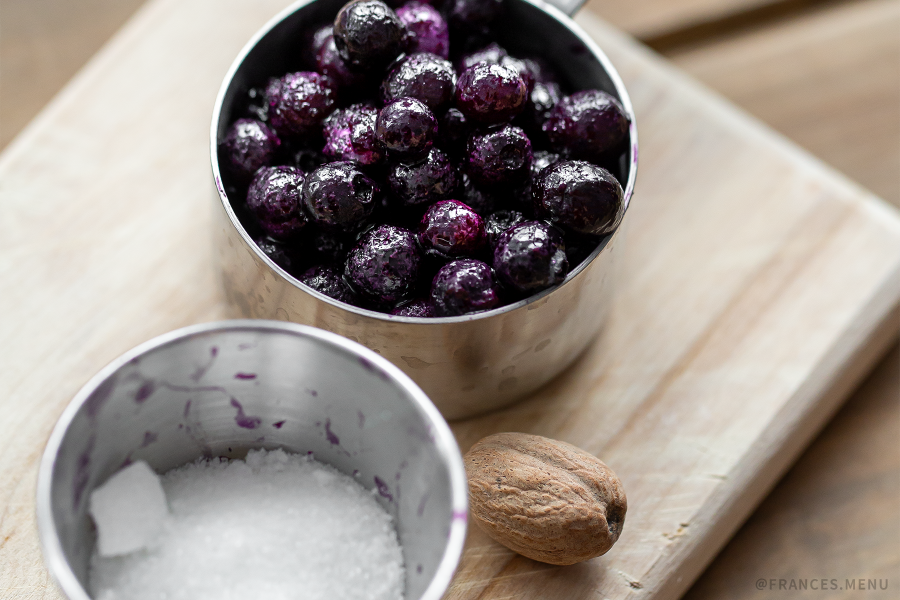
This easy recipe creates an impressive Earl Grey Panna Cotta complimented by a delicious Blueberry Compote! Make ahead to impress your date or for a house party!
Continue Reading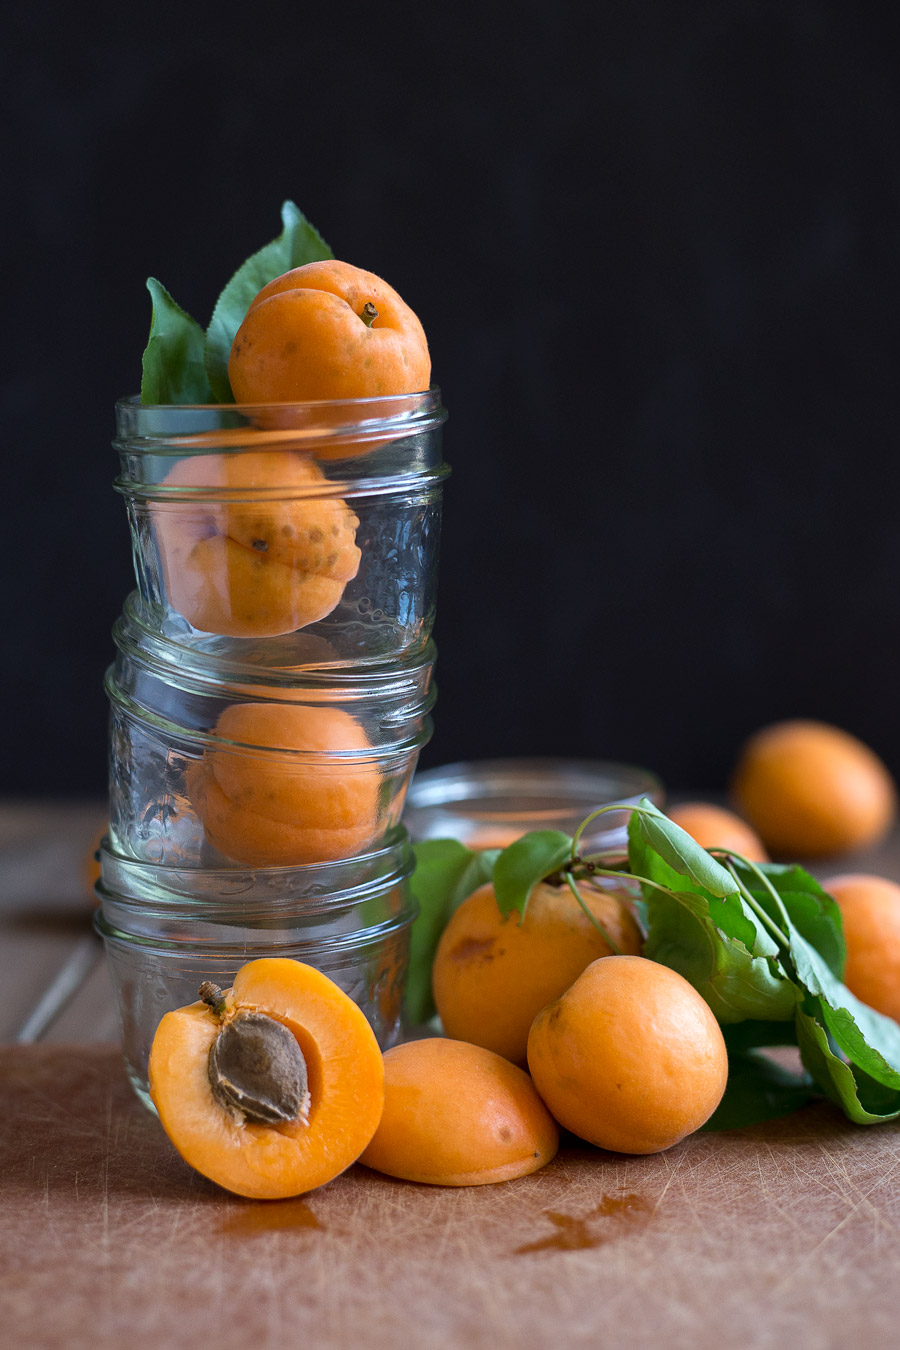
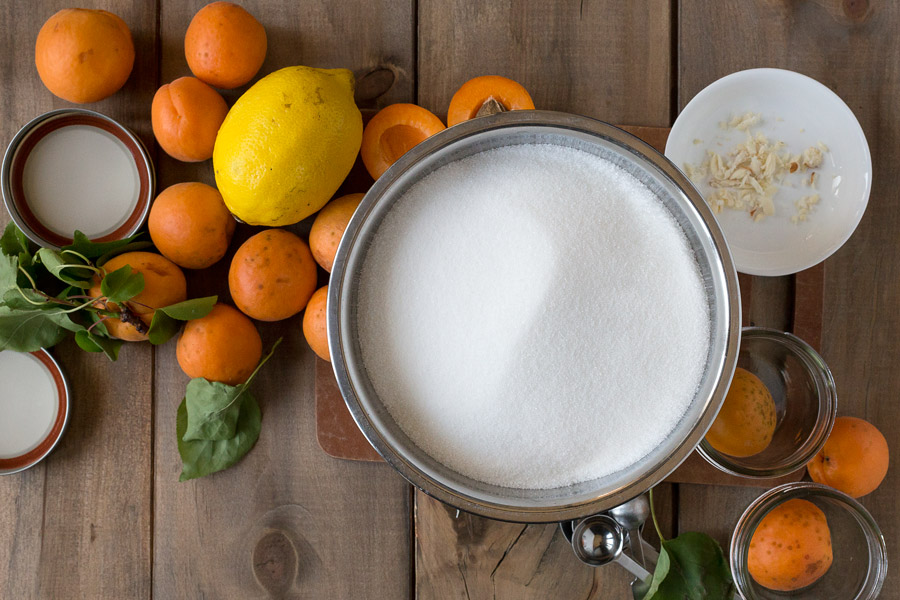
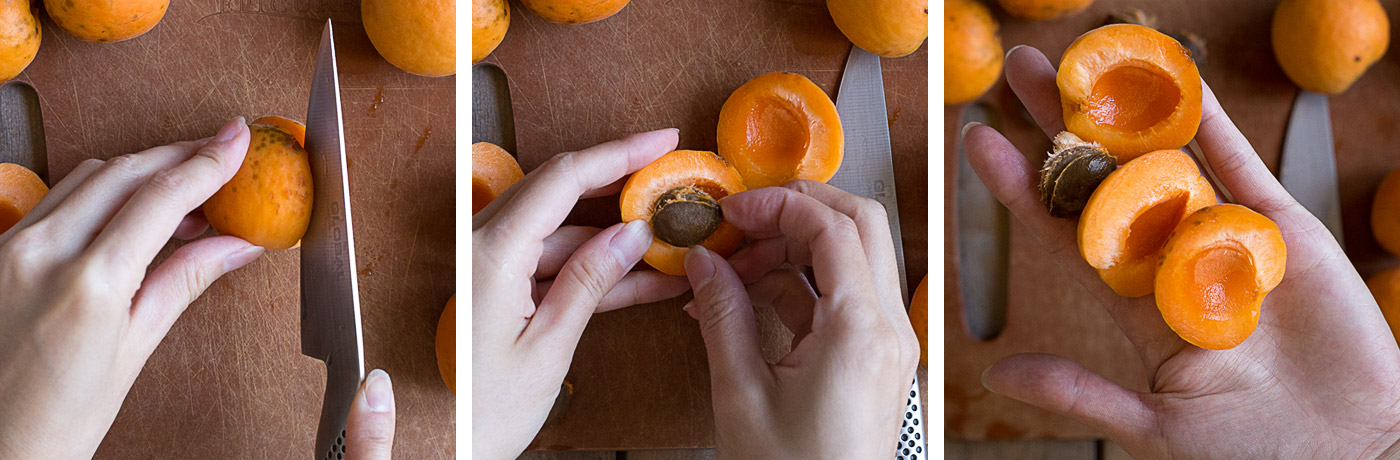
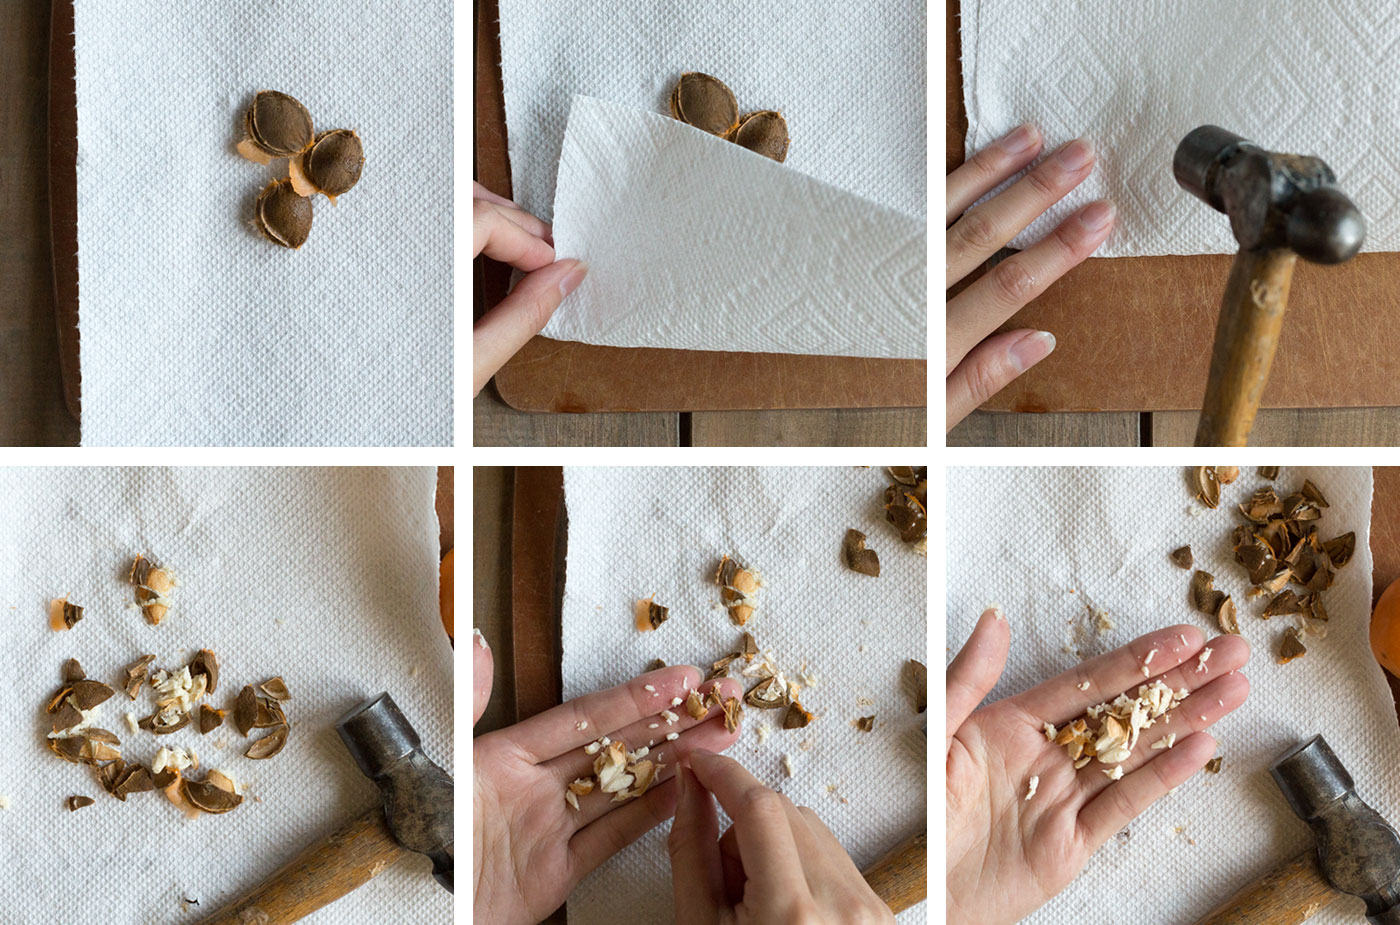
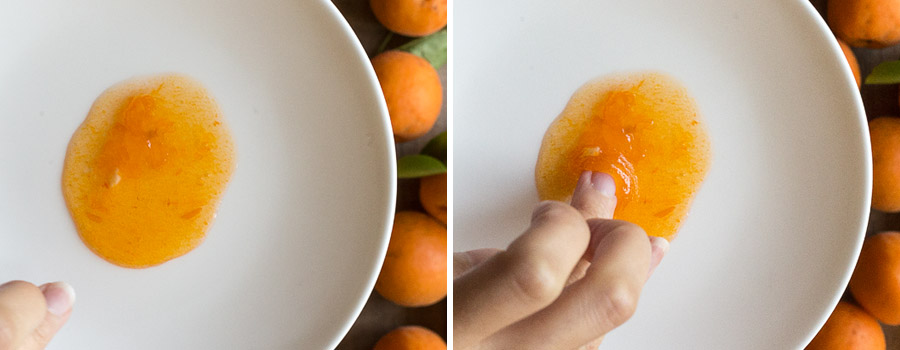
For the first time ever, I made jam—specifically, apricot jam using freshly picked, completely organic apricots! Never really having adopted the ‘think local’ and ‘seasonal cooking’ attitude, this was an exciting experience for me. There’s something to be said about adapting your cooking to what mother earth provides at that given moment—it feels incredibly rewarding.
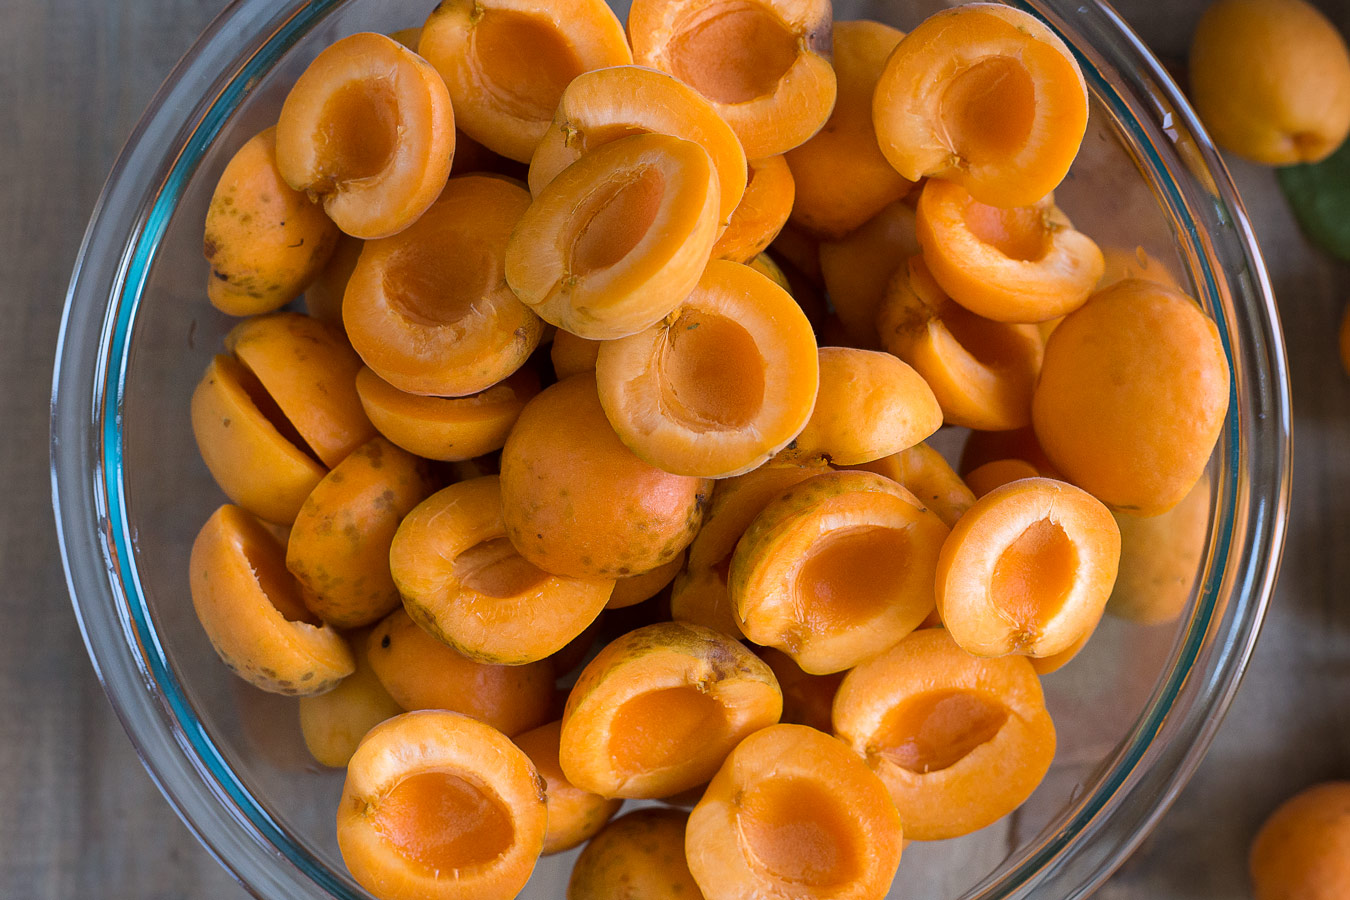
It began with my parents bringing over a few apricots, telling me that their neighbour’s tree had an overabundance of these tiny orange fruits ripe for the picking and that they were giving them away.
I asked if there were anymore and they said there were so many that they could probably get me several pounds, which they did. I was then faced with a dilemma, I wasn’t able to eat all of them in time which would be quite wasteful. So I thought, why not make jam? Here’s how I did it.

First, I googled ‘Apricot Jam Recipe’ and of course, David Lebovitz’s ‘Apricot Jam’ recipe was the first result on the page. I am a big fan of his writing and I purchased his book ‘My Paris Kitchen’ a while back (quite an entertaining read, although I am guilty of having yet tried any of the recipes in it!).
With confidence, I followed the recipe to a tee (with scaled ingredient measurements), although I also watched Martha’s Stewart’s Apricot Jam instructional video for additional research. As for the canning process, there are many online resources available and I decided to use the canning beginner’s guide published on ‘Food in Jars’.
I used the Bernadin’s 125 ml canning jars (available at Walmart and Canadian Tire), which were the perfect size to give as gifts to friends and family. There are a lot of ‘canning kits’ for sale which include tongs specifically to fit around glass jars, a rod with a magnet on the end for picking up jar covers, and a funnel for filling the jars. These kits were tempting, but in the end, I stuck with getting an ordinary funnel and using regular cooking tongs to manoeuvre the jars and jar covers. For me, this worked out fine and I now have 12 jars of Apricot jam (some already handed out) which pair wonderfully with toast or scones.
From this experience, I learned two new skills—how to make jam (incredibly easy), and how to ‘can’ jam so it will have a longer shelf life. I wish I had done this sooner because this is definitely a notch on my culinary belt that I’m proud of! I hope you try it too!


My mother, who is an incredibly talented cook, taught me that adding cornstarch is the trick to giving any watery sauce some thickness in most Chinese cuisine.
If you’ve ever been to Chinese dim sum, you’ve most likely had this dish before—Steamed Black Bean Spare Ribs. I can never say no to the simple yet magical combination of black beans and pork ribs. They are one of my favourite things to eat at dim sum, and I’ve learned to enjoy its saucy texture over the years. My recent craving for it had me running to the local TNT Chinese supermarket where I bought a bag of Chinese dried black beans to experiment. Little did I know it was so easy (and fast) to cook!

I’ll let you know that shopping for Chinese dried black beans was no easy feat. There were many brands to choose from and it didn’t help that I had heard of many horror stories about toxic chemicals and fake foods coming out of China. In the end, I went patriotic and bought one of the brands that originated from Hong Kong. Whichever one you purchase, make sure the black beans are dry and without sauce, if you are following my recipe.
Chinese dried black beans don’t look very appetizing, that’s for sure. However, what they lack in looks they make up in the intense salty fermented flavour. This ingredient is usually the main player in any dish that calls for it and a little bit goes a long way. I would also recommend trying these black beans with a bowl of plain white rice and a fried egg. Just thinking about this combination gets me drooling—once you try it, you will understand.

My mother, who is an incredibly talented cook, taught me that adding cornstarch is the trick to giving any watery sauce some thickness in most Chinese cuisine. One of the defining characteristics of black bean pork ribs is its thick saucy glaze, which is why this recipe uses a lot of cornstarch. If you don’t like this texture, you can dial it down by reducing this ingredient.

Pan-Fried Soft Shell Crab is extremely easy to prepare and cook. The basics are as follows: butter, soft shell crab, a pan and heat. Add some garlic and a squirt of lemon and you have a mouth-watering appetizer on your plate—one with a crispy outer shell filled with sweet juicy crab meat.


